-
Content Count
661 -
Joined
-
Last visited
-
Days Won
28
Everything posted by INVALID
-
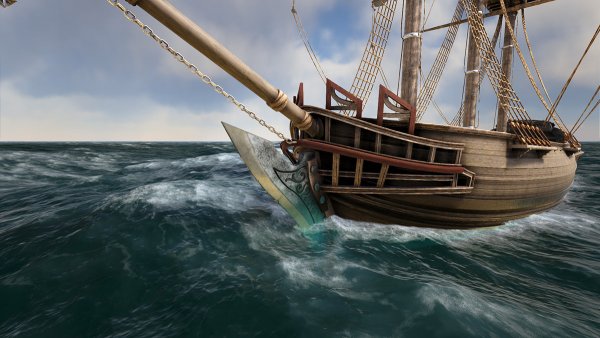
![WEEK 5 - [EU PVP] THE WHALE'S WRATH.jpg](https://cdn.playatlas.com/uploads/monthly_2019_01/small.582793265_WEEK5-EUPVPTHEWHALESWRATH.jpg.2e1b62c02643299c36b6ed2bc90affc4.jpg)
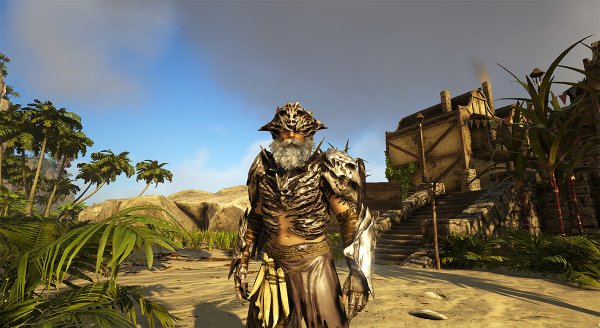
From the album: Official Media
-
![WEEK 4 - [EU PVE] THE SIREN'S CALL.jpg](https://cdn.playatlas.com/uploads/monthly_2019_01/small.1727589858_WEEK4-EUPVETHESIRENSCALL.jpg.a3386b0b590b52dafed6ac59d9aa8871.jpg)
From the album: Official Media
-

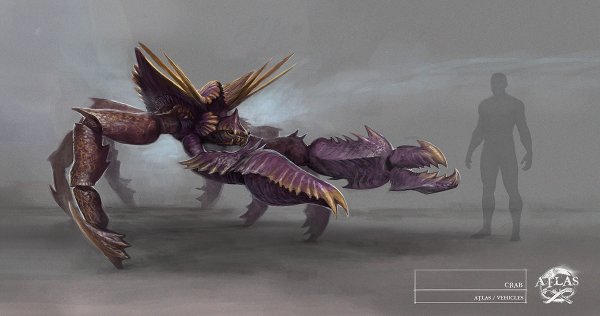
From the album: Official Media
-
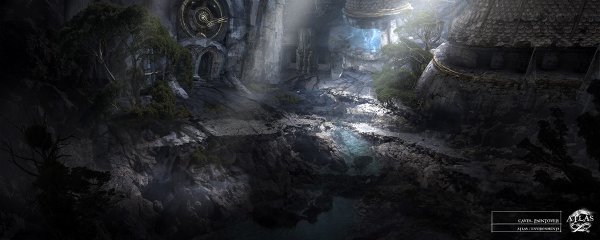
From the album: Official Media
-
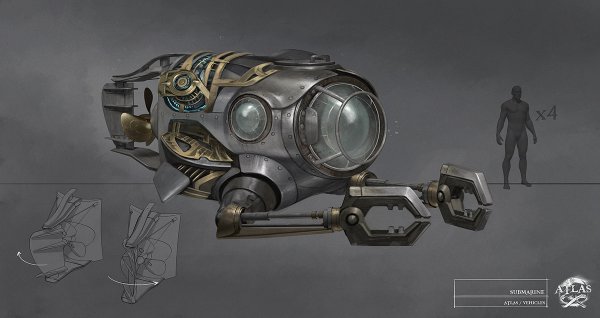
From the album: Official Media
-

From the album: Official Media
-
From the album: Official Media
-
From the album: Official Media
-
From the album: Official Media
-
From the album: Official Media
-
From the album: Official Media
-
From the album: Official Media
-
From the album: Official Media
-

Fountain of Youth Location(s) & Issues
INVALID replied to Dragonhawk828's topic in General Discussion
An update regarding the Rejuvenate buff; even after death it still persists on your character, however you may not see it in the UI. Just relog (may have to do it more than once), and it'll show in your UI. We're investigating why it isn't properly replicating to clients. -
Fountain of Youth Location(s) & Issues
INVALID replied to Dragonhawk828's topic in General Discussion
We've an issue with the Rejuvenated buff at the moment which makes it not persist through death. I'd recommend not going after the Fountain until it's resolved in an upcoming (hopefully minor) update. Unless of course you wish to remove the 'old age' debuff, but I am not sure if we'll be able to retroactively restore the rejuvenated buff for anyone that loses it presently. No ETA on that atm. -
Will check this out, theoretically should be possible to solve it.
-
This should be fixed now with the latest update. Please let me know if you're still having problems
-
Regarding elephants, the change took place as specific-resource weight reduction was not something that they were intended to do (esp due to how they get passed ship weights), however, we'll be re-balancing the base weight of all tamable creatures early next week.
-
I'll flag up the issues regarding OpenSSL and CURL. It would be good to know what version of Linux you guys are using that is running into these issues, and whether you're able to host ARK servers on those same operating systems.
-
Just to follow up on this, companies that are involved in cheating are risking themselves to wipe. We wiped 2 more companies within the last 8 hours, 1 on NA PVP and 1 on EU PVP and will wipe more as necessary.
-
UPDATE 2: We've fixed some devkit related crashes, latest binaries can be download here: http://atlasdedicated.com/ATLAS_DevKit_Fixed_Binaries.zip and should be extracted into this location: \Projects\ShooterGame\Binaries\Win64\ UPDATE: We've fixed the issue with uploading content to the ATLAS Steam Workshop. Just download this file http://atlasdedicated.com/SteamVDF.template and place it here: \ModTools\SteamVDF.template (overwriting the old one). We've also updated the ATLAS_DevKit_v12.0.zip archive with the corrected file as well. We’re excited to announce, at long last, the ATLAS Devkit is ready to download! The ATLAS Devkit is a highly edited and simplified version of the Unreal Engine 4 Editor specifically compiled to streamline the process of creating mods, maps, and more for ATLAS, and to upload them directly to Steam Workshop for other users to download and play. In addition to the Steam Workshop, we have our own section of the forums dedicated to all things modding,. Feel free to use Navigator’s Tools category for general discussion, tutorials, and even showcase your mods! The Devkit will be launching with a lot of additional functionality including the ability to host servers without using the seamless grid system, but rather traditional "single server" specifically using Steam Workshop maps. Here are some more details: Downloading the ATLAS Dev Kit So if you want to make Mods & Maps for ATLAS, get the ATLAS Dev Kit here (sorry for the huge download, soon we’ll be using the Epic Launcher which is much more efficient but it will take some days to get it up there): http://atlasdedicated.com/ATLAS_DEVKIT_FULL_v100_FIXED.zip There is also an optional package download for the ocean map files: http://atlasdedicated.com/ATLAS_DEVKIT_v100_OceanMaps.zip Extract it to some location where you have 180 GB of free space (SSD recommended), and then run it with \ATLASDevKit.bat Running ATLAS Steam Workshop Content (Mods, Map Extensions, and Maps) in ATLAS If you’re hosting a seamless grid, all Mod Steam Workshop ID’s that you wish to use (also including any new persistent level Map Mod ID’s, and any Island Extension Mod ID’s) ought to to be specified here in the Grid json or via the World Grid editor (in Mod stacking order): Which is equivalent to adding ID’s directly into the ServerGrid.json here: However if you’re running a Non-seamless-grid Mod map, then you need to specify all the Mod ID’s (including the Mod Map’s ID) that you wish to use via commandline like so: ShooterGameServer.exe OceanTestLevelMod?SessionName=WhateverSessionName?AltSaveDirectoryName=WhateverSaveDirectory?ServerAdminPassword=whateverserverpassword?MaxPlayers=70?QueryPort=57557?Port=5757?GameModIds=1627890405,1625331561,1627715666?MapPlayerLocation=true -log -server -culture=en -NoCrashDialog -NoBattleye -NoSeamlessServer You can also add more mods in the Game.ini with this section: [ServerSettings] ActiveMods=12334593945,875445124 Upon being launched, the server will then automatically download and install the Mods upon being launched, as well as update them each time the server is run. If you wish to disable the autodownload/update functionality, you can run the server with -manualmanagedmods Creating Mods To make a Mod using the ATLAS Dev Kit, as you may remember from ARK, simply create a child of “Blueprint'/Game/PrimalEarth/CoreBlueprints/PrimalGameData_BP.PrimalGameData_BP'” into your “Mods\YourModName” folder. We recommend following the naming scheme of “PrimaGameDataBP_YourModName.uasset”. Then change whatever values you in that new GameData asset to alter the game functionality (note there are various new fields for ATLAS, including “AdditionalInventoryComponentAppends” to add new craftable item types to existing inventories). Then click the “Steam Upload” button in the toolbar, select the folder of your Mod in the Steam Upload dialog, and click “Cook Game Mode”. After the Cook process is done (if you get a crash dialog at the end of the Cook process, just close the crash dialog as it’s harmless), browse for a small preview PNG (256x256 or so), add a Title, Description, Visibility Setting, and Upload to Steam (input your Steam Username and Password when prompted). Creating Map (Island) Extensions One of the most exciting new concepts for Workshop Content in ATLAS is the idea of “Map Extensions”, which allows you to add new sets of Islands and landmasses that server hosts can place upon their seamless grid layouts. To create a “Map Extension” for use in seamless grid layouts, simply open “SeamlessTest\Ocean.umap” in the Editor, and add a set of new uniquely named worldcomposition sublevels to the “SeamlessTest\” folder (yes, put them there, not in your Mod folder). These should all be centered on the ORIGIN 0,0,0 (where they’ll be placed in the actual seamless grid layout is up to the server host). Then, set the WorldComposition layer for each those Sublevels to “Farthest”, “Far” or “Near” depending on whether they’re long-distance or short-distance visible levels. Finally, create an empty “Mods\YourExtensionName” folder, and then select it in the Steam Upload dialog. Then input the names of each of your new sublevels into the Maps field like so, and click “Cook Map Extension”: After the Cook process, you should create a new Island Template for your landmass within the Server Grid Editor, like so, filling in the size and preview image (take a topdown screenshot in the editor) as appropriate to your Island’s appearance: Be sure to add a uniquely named “Extension” for your Island Template, because this will create a unique directory here: \ServerGridEditor\IslandExtensions\[EXTENSION_NAME] We recommend that you copy that unique extension directory into “\ModTools\Output\YourMapExtensionName\IslandExtensions” after you have cooked, like so: And then instruct server hosts, after subscribing to your Map Extension on their Steam clients, to copy the “IslandExtensions” folder you’ve included with your files, into their local ServerGridEditor application’s directory so that they can place your new Island Templates within their own server layout (as many times as they wish). So after a host downloads your content on their Steam client, the hosts should copy this folder: \SteamLibrary\steamapps\workshop\content\834910\[YOUR_WORKSHOP_CONTENT_ID]\IslandExtensions\ Over onto this in their ServerGridEditor application directory: \ServerGridEditor\IslandExtensions\ hey’ll then see your custom Island Template appear in the list of available Island Templates when they reload the Server Grid Editor. Note that server hosts should remember to add your Map Extension’s ID to their Grid’s Mod ID’s list in the Server Grid settings! And yes it’s entirely possible for a single Map Extension package to include multiple new Island Templates and landmasses for server hosts to use, you don’t have to limit to just a single new Island Template! (Note: if you set the sublevels to UNCATEGORIZED layer, they will be always-loaded, once, on every grid server -- that may be useful if you want, say, a persistent weather system addition to be present in every grid region.) Creating Maps Making a new “base” Map is similar to cooking a Mod, with the uniquely-named map file .umap needing to be placed in your Mods\YourMapName\ folder. Then click “Cook Map” in the Steam Uploads dialog. Typically, new custom Maps will ARK-style (and not seamless grid persistent levels), so you’ll want to run those with the following server commandline: ShooterGameServer.exe OceanTestLevelMod?SessionName=WhateverSessionName?AltSaveDirectoryName=WhateverSaveDirectory?ServerAdminPassword=whateverserverpassword?MaxPlayers=70?QueryPort=57557?Port=5757?GameModIds=1627890405?MapPlayerLocation=true -log -server -culture=en -NoCrashDialog -NoBattleye -NoSeamlessServer However, you can certainly make new “seamless grid persistent levels” too, such as this SkyWorldLevel which removes the Ocean (and of course it could new things too, such as a different DayCycleManager for new weather systems!). To make new “seamless grid persistent levels”, we suggest resaving SeamlessTest\Ocean.umap into your Mods\WhateverCustomMapName directory, and then modifying it as you see fit. We think it’d be very cool to make some Avatar-esque floating islands Map Extensions to go along with that... New “seamless grid persistent levels” are cooked the same way, but then simply run with the grid commandline like so (presuming that the Map Steam Workshop ID for the level content is specified within the ServerGrid’s json, or via the [ServerSettings] ActiveMods section of the Game.ini!): ShooterGameServer.exe SkyWorldLevel?ServerX=12?ServerY=8?AltSaveDirectoryName=JerTest?ServerAdminPassword=grapeshot?MaxPlayers=200?ReservedPlayerSlots=50?QueryPort=57557?Port=5757?SeamlessIP=37.10.127.116?MapPlayerLocation=true -log -server -culture=en -NoCrashDialog -NoBattleye -automanagedmods Steam Workshop ID 1626926342 for ‘SkyWorldLevel’ Note: ATLAS currently only supports client-and-dedicated server mode. Running in single-player or as a listen-server will have issues. To experiment with Seamless Grid levels (as a client) in the Editor, you can run Play-In-Editor on “SeamlessTest\Ocean.umap” with these Server Game Options in the Advanced Settings dialog: You can substitute whatever ServerX ServerY coordinates you want to play on different grid regions (the game uses whatever ServerGrid.json is located in the ShooterGame folder). Alternatively if you just wish to try your new Islands, or a specific combination of sublevels, without setting them up on the json grid layout, you can run Ocean.umap PIE without any ServerX/ServerY commands and it’ll Play-In-Editor without being on any specific region. If you have any sublevels VISIBLE in the Editor Viewport before you do this, they’ll remain loaded in Play-In-Editor, presumably at the origin where you constructed your Islands. In this way, you can test and iterate on the gameplay of your new islands without having to set them up on the servergrid (of course, this method is only practical for testing out one new island set of sublevels at a time). You can also run the Seamless Grid outside the Editor (useful for testing transition testing), with the following batch files: DedicatedServerAllFourAndClient_CLEAN.bat And alternatively ClientSub2.bat if you wish to connect a second client. You can also run a single non-SeamlessGrid server (such as TestMapArea or OceanTest) outside the Editor with the following batch files: GameDedicatedServer.bat GameClient.bat And alternatively GameClient2.bat if you wish to connect a second client Here are some example simple Mods/Maps we’ve provided, the sources for these are included in the DevKit ShooterGame\Content\Mods folder to help you get started: ATLAS OceanTest Level https://steamcommunity.com/sharedfiles/filedetails/?id=1627890405 This is a non-seamlessgrid level, a traditional ARK-style single-server level that has an ocean and some basic box floors for testing, as an example. Servers can host with this: ShooterGameServer.exe OceanTestLevelMod?SessionName=WhateverSessionName?AltSaveDirectoryName=WhateverSaveDirectory?ServerAdminPassword=whateverserverpassword?MaxPlayers=70?QueryPort=57557?Port=5757?GameModIds=1627890405?MapPlayerLocation=true -log -server -culture=en -NoCrashDialog -NoBattleye -NoSeamlessServer ATLAS Sky World https://steamcommunity.com/sharedfiles/filedetails/?id=1626926342 This is a resave of OceanTest.umap, but with the Ocean water removed. It’s used as an example of how to have an alternate seamlessgrid persistent level. You can host it by adding this to your ServerGrid.json: Or by setting that value here in the Server Grid Editor: Or in the Game.ini: [ServerSettings] ActiveMods=1626926342 And then run the servers with: ShooterGameServer.exe SkyWorldLevel?ServerX=12?ServerY=8?AltSaveDirectoryName=JerTest?ServerAdminPassword=grapeshot?MaxPlayers=200?ReservedPlayerSlots=50?QueryPort=57557?Port=5757?SeamlessIP=[THEIP]?MapPlayerLocation=true -log -server -culture=en -NoCrashDialog -NoBattleye Extended Vehicles Mod (Stackable) https://steamcommunity.com/sharedfiles/filedetails/?id=1627715666 As an example, this stackable Mod appends craftable items (via the PrimalGameData) to the Smithy inventory for players to build the Airplane, Tank, and Steampunk Airship vehicles. Modders can duplicate “Blueprint'/Game/Mods/ExtendedVehiclesMod/PrimalItem_VehicleGeneric.PrimalItem_VehicleGeneric'” into your own Mods, and inherit from it per-Vehicle, as a foundation for craftable vehicle spawning. BoxIslandMapExtension https://steamcommunity.com/sharedfiles/filedetails/?id=1626922438 A very simple box-island-with-trees “Map Extension” for seamless grids, placeable as an island on your servergrid layouts using the included Island Template files. To use this in a server layout, in addition to adding the ID to the Mod Ids for the grid, subscribe to the files on a client and then copy this folder: SteamLibrary\steamapps\workshop\content\834910\1626922438\IslandExtensions Over this folder onto hosts’ Server Grid Editor application directory: \ServerGridEditor\IslandExtensions\ Then relaunch the Server Grid Editor and you’ll see the new “BoxIsland” Template available for use in your layout wherever you want: MyAtlasTestMod https://steamcommunity.com/sharedfiles/filedetails/?id=1625331561 A very simple “Base” or non-stackable Mod that just adds a few different Default Feats, used in testing that a base non-stackable Mod works. Stacking MOD Test https://steamcommunity.com/sharedfiles/filedetails/?id=1626876784 This is a stackable Mod that adds an additional unlocked Feat (testing stacking functionality). Hopefully that covers a lot of information in order for you guys to get started! Something you’ll notice is that we didn't strip the majority of ARK content from the kit, and that’s because it can be used as a basis for building new content in ATLAS, especially for those of you familiar with the ARK DevKit, and some of you may find it helpful when trying to port over your existing ARK Mods. As for the question regarding can ARK content be used in ATLAS and vice versa? The overall answer is that we’re fine with it, however, the only thing that would not be allowed and will cause your mod to be removed from the Steam Workshop is using any Wildcard specific maps. This means that you are not allowed to port over The Island, Scorched Earth, Aberration, Extinction, or Ragnarok. We’ll be working on some additional documentation that will help guide users through some of the new systems in the DevKit, so be on the lookout for that. Good luck, we can't wait to see all the epic content you guys create! Happy Sailing, Grapeshot Games For the latest dispatch on #playATLAS keep yer one good eye trained on this here information Natter n' chatter on Discord: https://discord.gg/playatlas Navigate ye olde Subreddit: https://www.reddit.com/r/playatlas Hear ye, hear ye on Twitter: https://twitter.com/sailtheatlas Watch us scallywags on Twitch: http://twitch.tv/sailtheatlas Plus ye can band with us Pirates on Facebook: https://www.facebook.com/playatlasgame View full article
-
 UPDATE 2: We've fixed some devkit related crashes, latest binaries can be download here: http://atlasdedicated.com/ATLAS_DevKit_Fixed_Binaries.zip and should be extracted into this location: \Projects\ShooterGame\Binaries\Win64\ UPDATE: We've fixed the issue with uploading content to the ATLAS Steam Workshop. Just download this file http://atlasdedicated.com/SteamVDF.template and place it here: \ModTools\SteamVDF.template (overwriting the old one). We've also updated the ATLAS_DevKit_v12.0.zip archive with the corrected file as well. We’re excited to announce, at long last, the ATLAS Devkit is ready to download! The ATLAS Devkit is a highly edited and simplified version of the Unreal Engine 4 Editor specifically compiled to streamline the process of creating mods, maps, and more for ATLAS, and to upload them directly to Steam Workshop for other users to download and play. In addition to the Steam Workshop, we have our own section of the forums dedicated to all things modding,. Feel free to use Navigator’s Tools category for general discussion, tutorials, and even showcase your mods! The Devkit will be launching with a lot of additional functionality including the ability to host servers without using the seamless grid system, but rather traditional "single server" specifically using Steam Workshop maps. Here are some more details: Downloading the ATLAS Dev Kit So if you want to make Mods & Maps for ATLAS, get the ATLAS Dev Kit here (sorry for the huge download, soon we’ll be using the Epic Launcher which is much more efficient but it will take some days to get it up there): http://atlasdedicated.com/ATLAS_DevKit_v12.0.zip Extract it to some location where you have 180 GB of free space (SSD recommended), and then run it with \ATLASDevKit.bat Running ATLAS Steam Workshop Content (Mods, Map Extensions, and Maps) in ATLAS If you’re hosting a seamless grid, all Mod Steam Workshop ID’s that you wish to use (also including any new persistent level Map Mod ID’s, and any Island Extension Mod ID’s) ought to to be specified here in the Grid json or via the World Grid editor (in Mod stacking order): Which is equivalent to adding ID’s directly into the ServerGrid.json here: However if you’re running a Non-seamless-grid Mod map, then you need to specify all the Mod ID’s (including the Mod Map’s ID) that you wish to use via commandline like so: ShooterGameServer.exe OceanTestLevelMod?SessionName=WhateverSessionName?AltSaveDirectoryName=WhateverSaveDirectory?ServerAdminPassword=whateverserverpassword?MaxPlayers=70?QueryPort=57557?Port=5757?GameModIds=1627890405,1625331561,1627715666?MapPlayerLocation=true -log -server -culture=en -NoCrashDialog -NoBattleye -NoSeamlessServer You can also add more mods in the Game.ini with this section: [ServerSettings] ActiveMods=12334593945,875445124 Upon being launched, the server will then automatically download and install the Mods upon being launched, as well as update them each time the server is run. If you wish to disable the autodownload/update functionality, you can run the server with -manualmanagedmods Creating Mods To make a Mod using the ATLAS Dev Kit, as you may remember from ARK, simply create a child of “Blueprint'/Game/PrimalEarth/CoreBlueprints/PrimalGameData_BP.PrimalGameData_BP'” into your “Mods\YourModName” folder. We recommend following the naming scheme of “PrimaGameDataBP_YourModName.uasset”. Then change whatever values you in that new GameData asset to alter the game functionality (note there are various new fields for ATLAS, including “AdditionalInventoryComponentAppends” to add new craftable item types to existing inventories). Then click the “Steam Upload” button in the toolbar, select the folder of your Mod in the Steam Upload dialog, and click “Cook Game Mode”. After the Cook process is done (if you get a crash dialog at the end of the Cook process, just close the crash dialog as it’s harmless), browse for a small preview PNG (256x256 or so), add a Title, Description, Visibility Setting, and Upload to Steam (input your Steam Username and Password when prompted). Creating Map (Island) Extensions One of the most exciting new concepts for Workshop Content in ATLAS is the idea of “Map Extensions”, which allows you to add new sets of Islands and landmasses that server hosts can place upon their seamless grid layouts. To create a “Map Extension” for use in seamless grid layouts, simply open “SeamlessTest\Ocean.umap” in the Editor, and add a set of new uniquely named worldcomposition sublevels to the “SeamlessTest\” folder (yes, put them there, not in your Mod folder). These should all be centered on the ORIGIN 0,0,0 (where they’ll be placed in the actual seamless grid layout is up to the server host). Then, set the WorldComposition layer for each those Sublevels to “Farthest”, “Far” or “Near” depending on whether they’re long-distance or short-distance visible levels. Finally, create an empty “Mods\YourExtensionName” folder, and then select it in the Steam Upload dialog. Then input the names of each of your new sublevels into the Maps field like so, and click “Cook Map Extension”: After the Cook process, you should create a new Island Template for your landmass within the Server Grid Editor, like so, filling in the size and preview image (take a topdown screenshot in the editor) as appropriate to your Island’s appearance: Be sure to add a uniquely named “Extension” for your Island Template, because this will create a unique directory here: \ServerGridEditor\IslandExtensions\[EXTENSION_NAME] We recommend that you copy that unique extension directory into “\ModTools\Output\YourMapExtensionName\IslandExtensions” after you have cooked, like so: And then instruct server hosts, after subscribing to your Map Extension on their Steam clients, to copy the “IslandExtensions” folder you’ve included with your files, into their local ServerGridEditor application’s directory so that they can place your new Island Templates within their own server layout (as many times as they wish). So after a host downloads your content on their Steam client, the hosts should copy this folder: \SteamLibrary\steamapps\workshop\content\834910\[YOUR_WORKSHOP_CONTENT_ID]\IslandExtensions\ Over onto this in their ServerGridEditor application directory: \ServerGridEditor\IslandExtensions\ hey’ll then see your custom Island Template appear in the list of available Island Templates when they reload the Server Grid Editor. Note that server hosts should remember to add your Map Extension’s ID to their Grid’s Mod ID’s list in the Server Grid settings! And yes it’s entirely possible for a single Map Extension package to include multiple new Island Templates and landmasses for server hosts to use, you don’t have to limit to just a single new Island Template! (Note: if you set the sublevels to UNCATEGORIZED layer, they will be always-loaded, once, on every grid server -- that may be useful if you want, say, a persistent weather system addition to be present in every grid region.) Creating Maps Making a new “base” Map is similar to cooking a Mod, with the uniquely-named map file .umap needing to be placed in your Mods\YourMapName\ folder. Then click “Cook Map” in the Steam Uploads dialog. Typically, new custom Maps will ARK-style (and not seamless grid persistent levels), so you’ll want to run those with the following server commandline: ShooterGameServer.exe OceanTestLevelMod?SessionName=WhateverSessionName?AltSaveDirectoryName=WhateverSaveDirectory?ServerAdminPassword=whateverserverpassword?MaxPlayers=70?QueryPort=57557?Port=5757?GameModIds=1627890405?MapPlayerLocation=true -log -server -culture=en -NoCrashDialog -NoBattleye -NoSeamlessServer However, you can certainly make new “seamless grid persistent levels” too, such as this SkyWorldLevel which removes the Ocean (and of course it could new things too, such as a different DayCycleManager for new weather systems!). To make new “seamless grid persistent levels”, we suggest resaving SeamlessTest\Ocean.umap into your Mods\WhateverCustomMapName directory, and then modifying it as you see fit. We think it’d be very cool to make some Avatar-esque floating islands Map Extensions to go along with that... New “seamless grid persistent levels” are cooked the same way, but then simply run with the grid commandline like so (presuming that the Map Steam Workshop ID for the level content is specified within the ServerGrid’s json, or via the [ServerSettings] ActiveMods section of the Game.ini!): ShooterGameServer.exe SkyWorldLevel?ServerX=12?ServerY=8?AltSaveDirectoryName=JerTest?ServerAdminPassword=grapeshot?MaxPlayers=200?ReservedPlayerSlots=50?QueryPort=57557?Port=5757?SeamlessIP=37.10.127.116?MapPlayerLocation=true -log -server -culture=en -NoCrashDialog -NoBattleye -automanagedmods Steam Workshop ID 1626926342 for ‘SkyWorldLevel’ Note: ATLAS currently only supports client-and-dedicated server mode. Running in single-player or as a listen-server will have issues. To experiment with Seamless Grid levels (as a client) in the Editor, you can run Play-In-Editor on “SeamlessTest\Ocean.umap” with these Server Game Options in the Advanced Settings dialog: You can substitute whatever ServerX ServerY coordinates you want to play on different grid regions (the game uses whatever ServerGrid.json is located in the ShooterGame folder). Alternatively if you just wish to try your new Islands, or a specific combination of sublevels, without setting them up on the json grid layout, you can run Ocean.umap PIE without any ServerX/ServerY commands and it’ll Play-In-Editor without being on any specific region. If you have any sublevels VISIBLE in the Editor Viewport before you do this, they’ll remain loaded in Play-In-Editor, presumably at the origin where you constructed your Islands. In this way, you can test and iterate on the gameplay of your new islands without having to set them up on the servergrid (of course, this method is only practical for testing out one new island set of sublevels at a time). You can also run the Seamless Grid outside the Editor (useful for testing transition testing), with the following batch files: DedicatedServerAllFourAndClient_CLEAN.bat And alternatively ClientSub2.bat if you wish to connect a second client. You can also run a single non-SeamlessGrid server (such as TestMapArea or OceanTest) outside the Editor with the following batch files: GameDedicatedServer.bat GameClient.bat And alternatively GameClient2.bat if you wish to connect a second client Here are some example simple Mods/Maps we’ve provided, the sources for these are included in the DevKit ShooterGame\Content\Mods folder to help you get started: ATLAS OceanTest Level https://steamcommunity.com/sharedfiles/filedetails/?id=1627890405 This is a non-seamlessgrid level, a traditional ARK-style single-server level that has an ocean and some basic box floors for testing, as an example. Servers can host with this: ShooterGameServer.exe OceanTestLevelMod?SessionName=WhateverSessionName?AltSaveDirectoryName=WhateverSaveDirectory?ServerAdminPassword=whateverserverpassword?MaxPlayers=70?QueryPort=57557?Port=5757?GameModIds=1627890405?MapPlayerLocation=true -log -server -culture=en -NoCrashDialog -NoBattleye -NoSeamlessServer ATLAS Sky World https://steamcommunity.com/sharedfiles/filedetails/?id=1626926342 This is a resave of OceanTest.umap, but with the Ocean water removed. It’s used as an example of how to have an alternate seamlessgrid persistent level. You can host it by adding this to your ServerGrid.json: Or by setting that value here in the Server Grid Editor: Or in the Game.ini: [ServerSettings] ActiveMods=1626926342 And then run the servers with: ShooterGameServer.exe SkyWorldLevel?ServerX=12?ServerY=8?AltSaveDirectoryName=JerTest?ServerAdminPassword=grapeshot?MaxPlayers=200?ReservedPlayerSlots=50?QueryPort=57557?Port=5757?SeamlessIP=[THEIP]?MapPlayerLocation=true -log -server -culture=en -NoCrashDialog -NoBattleye Extended Vehicles Mod (Stackable) https://steamcommunity.com/sharedfiles/filedetails/?id=1627715666 As an example, this stackable Mod appends craftable items (via the PrimalGameData) to the Smithy inventory for players to build the Airplane, Tank, and Steampunk Airship vehicles. Modders can duplicate “Blueprint'/Game/Mods/ExtendedVehiclesMod/PrimalItem_VehicleGeneric.PrimalItem_VehicleGeneric'” into your own Mods, and inherit from it per-Vehicle, as a foundation for craftable vehicle spawning. BoxIslandMapExtension https://steamcommunity.com/sharedfiles/filedetails/?id=1626922438 A very simple box-island-with-trees “Map Extension” for seamless grids, placeable as an island on your servergrid layouts using the included Island Template files. To use this in a server layout, in addition to adding the ID to the Mod Ids for the grid, subscribe to the files on a client and then copy this folder: SteamLibrary\steamapps\workshop\content\834910\1626922438\IslandExtensions Over this folder onto hosts’ Server Grid Editor application directory: \ServerGridEditor\IslandExtensions\ Then relaunch the Server Grid Editor and you’ll see the new “BoxIsland” Template available for use in your layout wherever you want: MyAtlasTestMod https://steamcommunity.com/sharedfiles/filedetails/?id=1625331561 A very simple “Base” or non-stackable Mod that just adds a few different Default Feats, used in testing that a base non-stackable Mod works. Stacking MOD Test https://steamcommunity.com/sharedfiles/filedetails/?id=1626876784 This is a stackable Mod that adds an additional unlocked Feat (testing stacking functionality). Hopefully that covers a lot of information in order for you guys to get started! Something you’ll notice is that we didn't strip the majority of ARK content from the kit, and that’s because it can be used as a basis for building new content in ATLAS, especially for those of you familiar with the ARK DevKit, and some of you may find it helpful when trying to port over your existing ARK Mods. As for the question regarding can ARK content be used in ATLAS and vice versa? The overall answer is that we’re fine with it, however, the only thing that would not be allowed and will cause your mod to be removed from the Steam Workshop is using any Wildcard specific maps. This means that you are not allowed to port over The Island, Scorched Earth, Aberration, Extinction, or Ragnarok. We’ll be working on some additional documentation that will help guide users through some of the new systems in the DevKit, so be on the lookout for that. Good luck, we can't wait to see all the epic content you guys create! Happy Sailing, Grapeshot Games For the latest dispatch on #playATLAS keep yer one good eye trained on this here information Natter n' chatter on Discord: https://discord.gg/playatlas Navigate ye olde Subreddit: https://www.reddit.com/r/playatlas Hear ye, hear ye on Twitter: https://twitter.com/sailtheatlas Watch us scallywags on Twitch: http://twitch.tv/sailtheatlas Plus ye can band with us Pirates on Facebook: https://www.facebook.com/playatlasgame
 -
Pathfinders, Earlier today, an admin’s steam account was compromised and used to cause some devastation on our Official NA PvP Network. To be clear this was not caused by a hack, third party program, or exploit. We have taken the appropriate steps to ensure this does not happen again. We’ll be rolling back our Official NA PvP Network by approximately 5 and a half hours to a network world save at approximately 11 AM UTC (3 AM PST/6 AM EST). We apologize for the inconvenience and we thank for your patience and understanding during this time. Sincerely, Grapeshot Games
- 76 replies
-
- 20
-

-

-

-

-

-

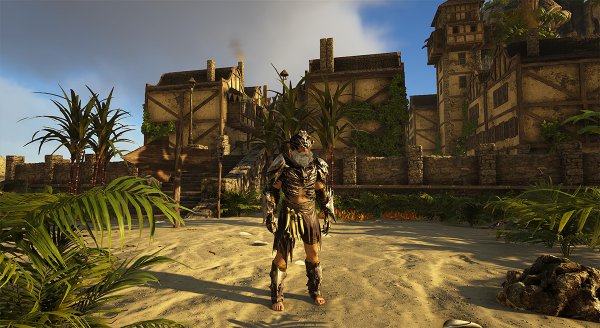
From the album: Official Media